How to Create Print-on-Demand Designs Without Being a Designer
Many newcomers looking to start a print-on-demand business often find themselves stuck on one question: "What if I don't know graphic design?" Does not knowing how to use Photoshop mean you can't launch a POD business? Rest assured—it is entirely possible; you don’t need to be a graphic design expert to open your own online store. Creating designs for print-on-demand has become much easier than it used to be. With the help of beginner-friendly design tools, ready-made templates, and AI-powered features, you can turn simple ideas into product artwork, even without years of design experience. In this guide, we will walk you through the entire process, empowering you to start creating designs for your print-on-demand products with confidence.
Can You Create Print-on-Demand Designs Without Design Skills?
If you have ever conducted market research, you may have discovered that many successful product designs are surprisingly simple—they require no complex design techniques at all. Sometimes, a catchy slogan paired with an engaging font or a small illustration is enough to create an appealing T-shirt or tote bag. The key is whether your design resonates with your target audience.
Furthermore, there are now many convenient tools available to help you get started quickly. Platforms like Canva offer editable templates, fonts, and graphics, so you don’t have to create everything from scratch. AI-powered design tools can also help you transform rough ideas into illustrations or visual concepts; by crafting precise prompts, you can refine these visuals to align with your specific vision and expectations.
What Makes a Good Print-on-Demand Design?
1. Understand your target audience
Start by thinking about who will buy your product. A funny design for dog owners will appeal to a different audience than a minimalist illustration aimed at outdoor enthusiasts. The more specific your target market is, the easier it becomes to come up with relevant design ideas.
2. Keep the design easy to understand
Customers usually see your products in small listing images before they can examine the actual details. A design with a clear message and recognizable visuals is easier to understand at a glance. Avoid adding so many fonts, colors, and decorative elements that the main idea gets lost.
3. Match the design to the product
Different products call for different design approaches. T-shirts work well with bold typography and illustrations, while mugs often look good with short messages or small graphics. Tote bags can feature minimalist artwork, and all-over print apparel gives you more room to experiment with repeating patterns and larger compositions.
4. Make your artwork original
Templates and stock graphics are useful starting points, but your finished design should have its own identity. Add your ideas, adjust the layout, and combine elements thoughtfully instead of simply copying something you found online.
6 Easy Ways to Create Print-on-Demand Designs Without Design Experience
Don't worry if you lack design experience; these 6 ways, well-suited for beginners, are worth a try.
1. Create Typography-Based Designs
Text-based artwork is one of the easiest ways to start creating print-on-demand designs. You only need a short phrase, a suitable font, and a little attention to layout.
Think about funny quotes for pet owners, motivational messages for gym enthusiasts, or personalized names for gift products. Choose a font that fits the message. A bold, playful typeface might work well for a humorous T-shirt, while a clean serif font can give a tote bag a more elegant look.
You can also experiment with curved text, different font sizes, and simple color combinations. Even a few words can become an attractive design when the typography is handled well.
2. Start with Ready-Made Templates
Starting with a blank canvas can feel intimidating. Templates solve that problem by giving you a layout you can edit rather than asking you to create everything yourself.
Open a tool like Canva or Kittl and search for templates related to your product or niche. Replace the sample text, change the colors, adjust the graphics, and rearrange the elements to suit your idea.
For example, you could turn a generic vintage T-shirt template into a design for coffee lovers by changing its wording and adding your own coffee-related artwork.
Just remember that a template is a starting point, not a finished product you should automatically resell. Check the platform's licensing terms and add enough original creative input to make the result your own.
3. Combine Simple Graphics and Illustrations
You do not have to draw every element yourself. Many online design platforms provide icons, shapes, and illustrations that you can use to build a composition.
Try combining a few related elements around one central theme. A mountain outline, a small sun, and a short outdoor-inspired phrase could work well on a camping T-shirt. Similarly, a paw print combined with a pet-related quote could make a simple design for dog owners.
The trick is to keep things visually consistent. Mixing illustrations with very different styles can make an otherwise good idea look messy.
4. Use Patterns and Repeating Motifs
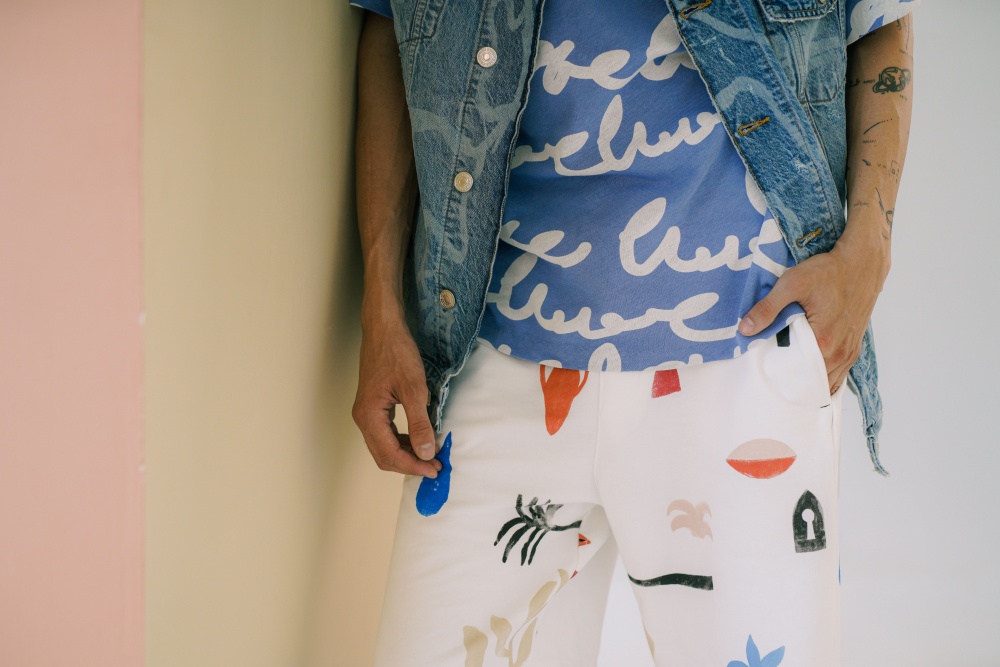
Patterns are especially useful when creating all-over print products. Instead of placing one graphic in the center, you can arrange several visual elements across the entire design area.
Start with a simple theme, such as flowers, tropical leaves, geometric shapes, or cute animals. Arrange the elements in a repeating layout, then experiment with spacing, rotation, and color variations.
This approach works particularly well for all-over print clothing, blankets, bags, and home decor products. You can start with just one illustration and create several different pattern variations from it.
5. Turn Your Photos or Personal Ideas into Designs
Your own photos can be another useful source of design inspiration. A picture of a pet, a favorite travel destination, or a memorable family moment can become the starting point for a personalized product.
You can edit the photo, remove its background, add decorative elements, or combine it with custom text. For instance, a pet portrait with the animal's name could become a thoughtful gift for pet owners.
This approach is also useful for creating personalized products for birthdays, anniversaries, and other special occasions. Just make sure you have the necessary rights and permissions to use any photos you did not take yourself.
6. Use AI to Generate Design Ideas and Artwork
AI tools can be particularly helpful when you have an idea but lack the skills to illustrate it yourself.
You can describe what you want in a text prompt and use an AI image generator to explore different styles. For example, try a prompt describing a hand-drawn vintage illustration of a golden retriever sitting among wildflowers, with a warm, limited color palette.
Once you have a result you like, refine it using an image editor. You may need to remove unwanted details, adjust the composition, or add original typography before using it on a product.
AI-generated artwork should be treated as a starting point rather than something you can upload without checking. Review the tool's commercial-use terms and avoid prompts that request copyrighted characters, recognizable brand logos, or another artist's protected work. If you sell on Etsy, remember that its current seller policy also requires disclosure when an item is created using AI.

Best Tools for Creating Print-on-Demand Designs
Choosing the right print-on-demand design software can save you a lot of time, especially when you are just getting started. You do not need to pay for several professional applications right away. A simple tool that matches your current skills is often enough. Here are some options worth exploring:
| Design Tool | Best For | Key Features |
|---|---|---|
| Canva | Beginners | Ready-made templates, fonts, drag-and-drop editing |
| Kittl | Typography and merchandise | Text effects, illustrations, vintage-style artwork |
| Adobe Express and Firefly | AI-assisted design | Image generation and quick editing |
| Adobe Photoshop | Image editing | Photo manipulation, background removal, detailed adjustments |
| Adobe Illustrator | Vector artwork | Scalable graphics, custom illustrations, precise layouts |
| PeaPrint Product Creator | Applying designs to POD products | Product customization and design previews |
- Canva is a great place to start if you have never designed anything before. Its drag-and-drop editor makes it easy to arrange text, images, and shapes without learning complicated software. There are also plenty of templates for apparel and other merchandise.
- Kittl is worth checking out if you plan to create typography-heavy designs. Its text effects, vintage graphics, and illustration resources are useful for creating merchandise with a distinctive visual style.
- Adobe Express and Firefly offer accessible ways to experiment with AI-assisted artwork. They are useful when you need visual ideas or want to make quick adjustments without building every element manually.
- Photoshop and Illustrator offer more control over detailed image editing and vector illustrations. They have a steeper learning curve, so beginners do not need to start with them unless they have a specific design requirement.
- PeaPrint Product Creator serves a different purpose. Instead of being your primary source of artwork, it helps you bring your designs onto actual POD products. You can choose an item, apply your artwork, and preview how the design looks before moving on to an order.
One important reminder: always check the commercial-use license of the assets you use. For example, Canva permits certain original product designs containing Free or Pro Content, but it does not allow users to resell its library content as standalone artwork. Kittl also has different commercial-use rules depending on the plan and content used.
How to Create Your First Print-on-Demand Design: A Step-by-Step Guide
Now that you know the basic design methods and tools, let's put them into practice. We will use a simple T-shirt design as an example.
Step 1. Choose a Niche and Design Idea
Before opening Canva or any other design tool, decide what you want to create and who you want to sell it to.
Let's say you want to target dog lovers. Instead of creating a generic dog-themed T-shirt, narrow down the idea. You could focus on golden retriever owners, people who enjoy taking their dogs outdoors, or customers looking for gifts for new pet parents.
Think about what these customers enjoy, the phrases they might relate to, and the types of products they would actually wear. Browse online marketplaces and social media for inspiration, but use your research to identify opportunities rather than copying existing designs.
Step 2. Pick Your Design Style
Once you have an idea, choose a visual style that fits your audience.
For our dog lover T-shirt, you might choose a minimalist dog illustration, a playful cartoon, or vintage-inspired typography. Each style communicates a different personality, so consider what your potential customers would prefer.
You can browse design examples on Pinterest, Etsy, or other creative platforms to collect inspiration. Save a few references and look for common elements such as color palettes, illustration styles, and typography choices.
Step 3. Create Your Design Using a Beginner-Friendly Tool
Open Canva or Kittl and create a new design. You can start with a blank canvas or select a template that matches your chosen style.
Add your main text or illustration first. For example, a simple golden retriever graphic could sit above the phrase "Life Is Better With a Dog." Choose a font that complements the illustration and use a small color palette to keep everything consistent.
Do not worry about making it perfect immediately. Focus on getting the basic idea onto the canvas. You can refine the details once the main composition is in place.
Step 4. Customize and Refine Your Artwork
This is where your design starts to become unique. Adjust the font, replace generic graphics, and experiment with the spacing between different elements.
Zoom out regularly to see how the artwork looks at a smaller size. Check whether the main message is easy to read and whether any graphic feels out of place.
It is also worth considering the color of the product itself. A dark design might disappear on a black T-shirt, while very light artwork could lose contrast on a white or pale garment. Choose colors with the final product in mind.
Step 5. Apply Your Design to a POD Product
With your artwork ready, it is time to see how it looks on an actual product.
Choose a POD platform such as PeaPrint, browse its product catalog, and select a T-shirt that suits your design. Open the product design tool and upload or apply your artwork.
Adjust the design's size and placement within the available print area. A graphic that looks balanced on a square canvas may need repositioning when placed on the front of a T-shirt.
Use the product preview to check the overall appearance. Pay attention to the scale of the artwork, its position, and how the colors look against the garment.
Step 6. Export and Save Your Design
Before exporting, double-check your artwork and make sure you are using the right file settings for the product.
Save a high-quality print file in the recommended format, and keep an editable copy of your original design. This makes it much easier to update the wording, change colors, or create variations for other products later.
Your first design does not need to be complicated. Once you complete the process, you can reuse what you have learned to create additional products for the same niche.
How to Prepare Print-Ready Files for POD Products
Choose the Right File Format
PNG and JPEG are two common formats for print-on-demand designs. PNG supports transparent backgrounds, making it a good choice for standalone artwork, text, and illustrations placed on apparel. JPEG does not support transparency, but it can work well for photographs and designs with full backgrounds.
SVG and PDF can also be useful when a product or printing provider supports vector artwork. However, always check the accepted file formats before exporting.
Check Image Resolution and Dimensions
Image resolution affects how sharp your artwork looks when printed. A file that appears clear on a small screen may become blurry when enlarged across a large print area.
You may often see 300 DPI recommended for print designs, but it is not a universal requirement. Different products and printing methods have different specifications. Some large apparel print areas can work with lower DPI values, while products with fine details may need higher resolution.
Instead of guessing, check the product's design template and recommended print dimensions before creating your file.
Use the Correct Color Profile
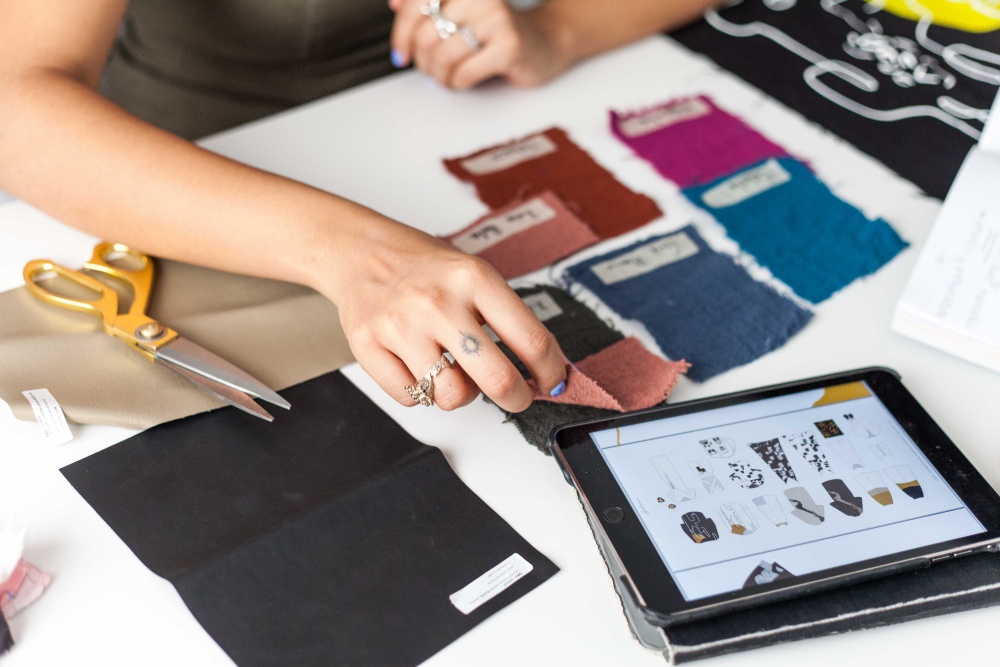
Colors can look different on a monitor compared with the final printed product. This happens partly because screens produce light, while printed materials reflect it.
Check your provider's preferred color profile before exporting. For example, Printful recommends sRGB for its uploaded print files. Other providers or production workflows may have different instructions.
Be particularly careful with very bright or highly saturated colors, as they may not reproduce exactly as they appear on your screen.
Check the Print Area and Design Placement
Before submitting your artwork, make sure important elements are inside the designated print area. Keep text and key graphics away from edges where they could be cropped or affected by production.
For clothing, check how the design sits on the garment. For mugs and other products with curved surfaces, consider how the artwork will appear when the item is viewed from different angles.
When in doubt, use the platform's product preview and order a sample to check the actual print result.
Start Creating Your Own Print-on-Demand Designs
Start with a simple idea, choose a beginner-friendly tool, and experiment with typography, illustrations, templates, or AI-generated artwork. As you gain confidence, you can develop more original designs and explore different product categories.
Ready to turn your ideas into products? Sign up for a free PeaPrint account, explore the product catalog, and use our Product Creator to bring your first design to life. You can start creating without investing in inventory or mastering complicated design software.
FAQs
Can I use Canva designs for print-on-demand products?
Yes, under certain conditions. Canva allows original product designs that combine its Free or Pro Content with your own creative input. However, you cannot simply print and sell its library elements as they are. Always review Canva's current content license and your POD provider's terms.
Can I use AI-generated images for print-on-demand?
Yes, provided the AI tool's terms allow commercial use and your artwork complies with applicable copyright and marketplace rules. You should also review the output carefully before selling it. If you sell AI-created products on Etsy, remember to disclose AI use in your listings.
Do print-on-demand designs need to be 300 DPI?
Not always. The required resolution depends on the product, print area, and printing method. Some products work well at lower resolutions, while others benefit from 300 DPI. Always check the specific file guidelines before uploading your artwork.